Setting up a chatbot in TG SmartAgent is simple with the drag-and-drop Flow Builder. You can create automated replies, menus, AI responses, assign chats to agents, and connect APIs without coding.
1. From the left menu, click Chatbot Flows. This is where all your chatbot automations are managed.
2. Create a New Flow: Click Build First Flow or + New Flow. A new flow builder page will open where you can design your chatbot logic.
3. Enter Basic Flow Details. At the top of the builder, fill in: - Flow Name: Enter a name for your chatbot flow. For Example: Welcome Flow - Trigger Keywords: Add words users will type to start this flow. For Example: hi, hello, start, help When someone sends these words, the chatbot will begin automatically.
4. Use the left-side menu to drag and drop blocks into the canvas. Available options include:
a. Message Blocks - Text - Photo - Document Use these to send replies or media files.
b. Interaction Blocks - Inline Buttons - URL Buttons - Reply Keyboard - List Menu - Poll - Quiz - Request Contact - Request Location Use these to collect responses and guide users.
c. Logic Blocks - API Call - API Forwarder - AI Responder - Assign Agent Use these for advanced automation.
5. Drag lines between blocks to decide what happens next. This creates a smooth automated chat journey.
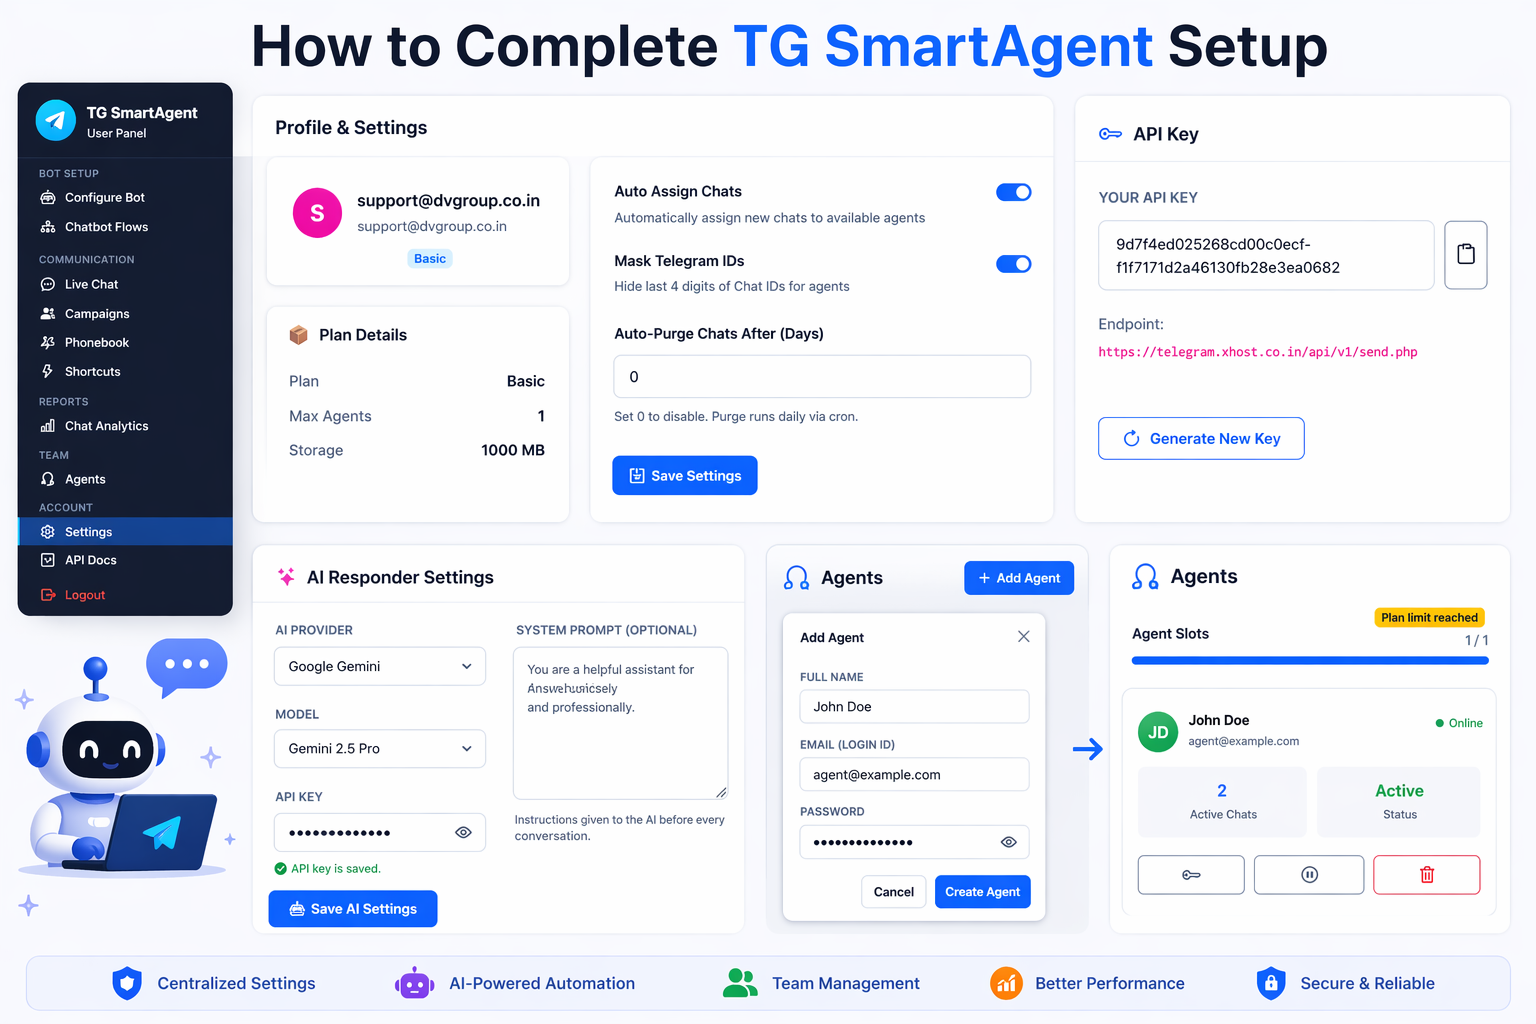
6. Add the AI Responder block if you want AI to answer messages automatically. This can reply to users until a live agent is assigned. Make sure AI settings are already configured in the Settings page.
7. Use the Assign Agent block to send chats to your support team. This helps when users need human assistance.
8. Save the Chatbot: Once your flow is ready, click Save in the top-right corner.
Your chatbot will become active for the selected trigger keywords.
With TG SmartAgent, you can build a powerful chatbot in minutes. Use menus, buttons, AI, and live agents together to automate customer support and improve response time.
Comments (0)
Leave a Reply
Your email address and mobile will not be published.