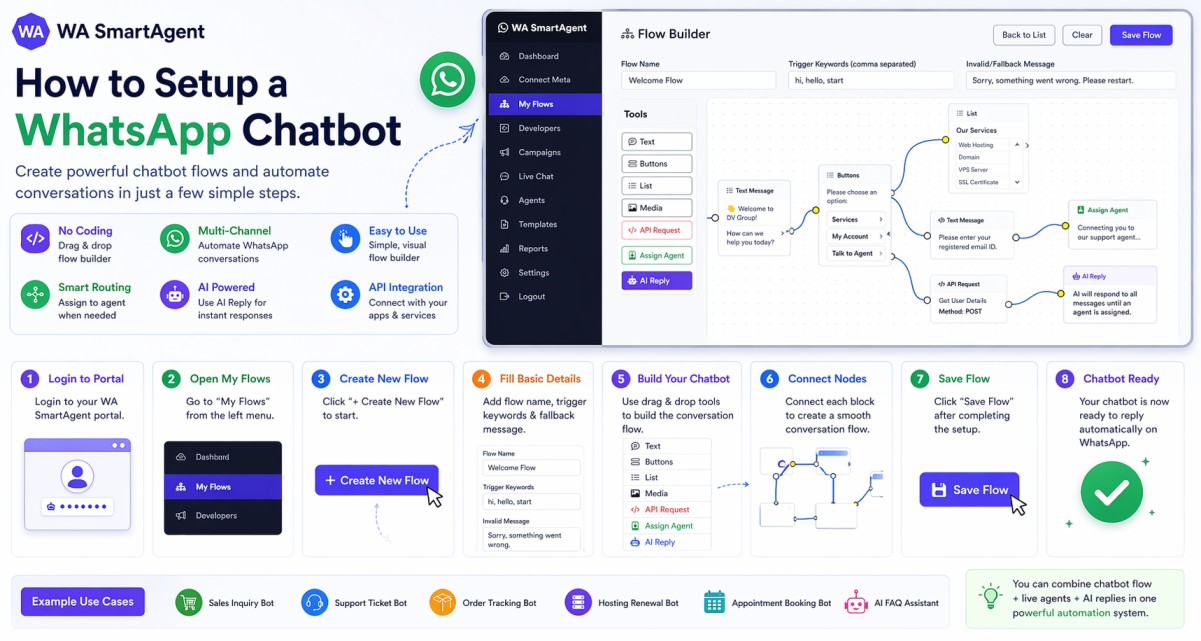
1. Log in to your WA SmartAgent Portal with your account credentials.
2. From the left menu, click on My Flows.
3. Click on + Create New Flow to open the chatbot Flow Builder.
4. Enter the chatbot setup details: a. Flow Name – Give your chatbot a name. b. Trigger Keywords – Add keywords separated by commas (example: hi, hello, support). c. Invalid/Fallback Message – Message shown when no valid option is selected.
5. Use the drag-and-drop tools from the left panel to create your chatbot journey. Available tools: a. Text – Send text messages. b. Buttons – Show clickable reply buttons. c. List – Show menu list options. d. Media – Send image, video, file, or audio. e. API Request – Connect your website/API dynamically. f. Assign Agent – Transfer chat to a live agent. g. AI Reply – Let AI reply automatically.
6. Link each block step-by-step to create a conversation flow based on customer replies.
7. After setup is complete, click Save Flow.
8. Now when a customer sends matching trigger keywords on WhatsApp, your chatbot will reply automatically.
Important Note: Chatbot replies till no agent is assigned.
Comments (0)
Leave a Reply
Your email address and mobile will not be published.